
4: Update and Remove
Up until now you have only inserted documents into our collection. Let’s take a look at how you can update and remove them by interacting with the user interface.
4.1: Add Checkbox
First, you need to add a checkbox element to your Task component:
imports/ui/Task.svelte
<li>
    <input
            type="checkbox"
            readonly
            checked={!!task.isChecked}
            on:click={toggleChecked}
    />
    <span>{ task.text }</span>
</li>
4.2: Toggle Checkbox
Now you can update your task document by toggling its isChecked field.
imports/ui/Task.svelte
<script>
  import { TasksCollection } from '../api/TasksCollection';

  export let task;

  const toggleChecked = () => {
    // Set the isChecked property to the opposite of its current value
    TasksCollection.update(task._id, {
      $set: { isChecked: !task.isChecked }
    });
  };
</script>
..
Now your app should look like this:

4.3: Remove tasks
You can remove tasks with just a few lines of code.
First add a button after the task.text in your Task component:
imports/ui/Task.svelte
..
<li>
<input
type="checkbox"
readonly
checked={!!task.isChecked}
on:click={toggleChecked}
/>
<span>{ task.text }</span>
<button class="delete" on:click={deleteThisTask}>×</button>
</li>
Now add the removal logic inside the <script /> tag. It will be just a new function that is activated when the user clicks in a delete button:
imports/ui/Task.svelte
<script>
    ..
    const deleteThisTask = () => {
        TasksCollection.remove(task._id);
    };
</script>
..
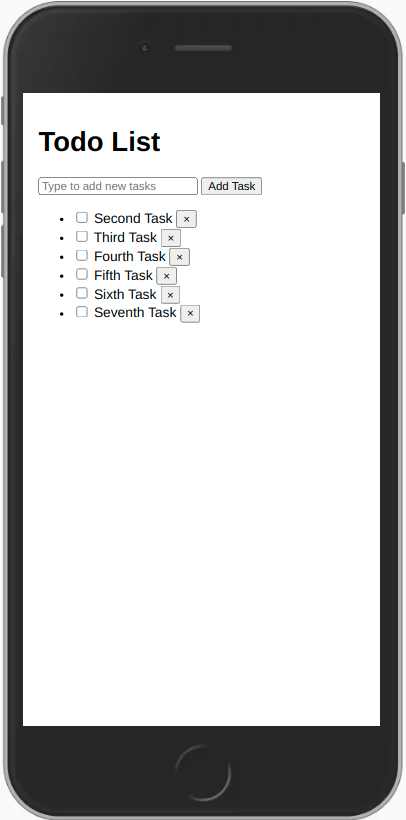
Your app should look like this:
Review: you can check how your code should be at the end of this step here
In the next step we are going to improve the look of your app using CSS with Flexbox.