
2: Collections
Meteor already sets up MongoDB for you. In order to use our database we need to create a collection, which is where we will store our documents, in our case our tasks.
You can read more about collections here.
In this step we will implement all the necessary code to have a basic collection for our tasks up and running.
2.1: Create Tasks Collection
We can create a new collection to store our tasks by creating a new file at imports/api/TasksCollection.js which instantiates a new Mongo collection and exports it.
imports/api/TasksCollection.js
import { Mongo } from 'meteor/mongo';

export const TasksCollection = new Mongo.Collection('tasks');
Notice that we stored the file in the imports/api directory, which is a place to store API-related code, like publications and methods. You can name this folder as you want, this is just an optional way to name it.
2.2: Initialize Tasks Collection
For our collection to work, you need to import it into the server so it sets a skeletal structure up.
You can either use import "/imports/api/TasksCollection" or import { TasksCollection } from "/imports/api/TasksCollection" if you are going to use on the same file, but make sure it is imported.
Now it is easy to check if there is data or not in our collection, otherwise we can insert some sample data easily if need be.
You don’t need to keep the old content of server/main.js.
server/main.js
import { Meteor } from 'meteor/meteor';
import { TasksCollection } from '/imports/api/TasksCollection';

const insertTask = taskText => TasksCollection.insert({ text: taskText });

Meteor.startup(() => {
  if (TasksCollection.find().count() === 0) {
    [
      'First Task',
      'Second Task',
      'Third Task',
      'Fourth Task',
      'Fifth Task',
      'Sixth Task',
      'Seventh Task'
    ].forEach(insertTask)
  }
});
So you are importing the TasksCollection and adding a few tasks to it over an array of strings, and for each string, calling a function to insert this string as our text field in our task document.
2.3: Render Tasks Collection
Now comes the fun part, you will render the tasks saved in our database. With Svelte that will be pretty simple to do.
On your file App.svelte, import the TasksCollection file and, instead of returning a static array, return the tasks saved in the database. Let’s use an extension of the Svelte’s $ reactive statements feature, to maintain your tasks, called $m:
imports/ui/App.svelte
<script>
  import Task from './Task.svelte';
  import { TasksCollection } from '../api/TasksCollection';

  $m: tasks = TasksCollection.find({}).fetch()
</script>


<div class="container">
  <header>
    <h1>Todo List</h1>
  </header>

  <ul>
    {#each tasks as task (task._id)}
        <Task task={task} />
    {/each}
  </ul>
</div>
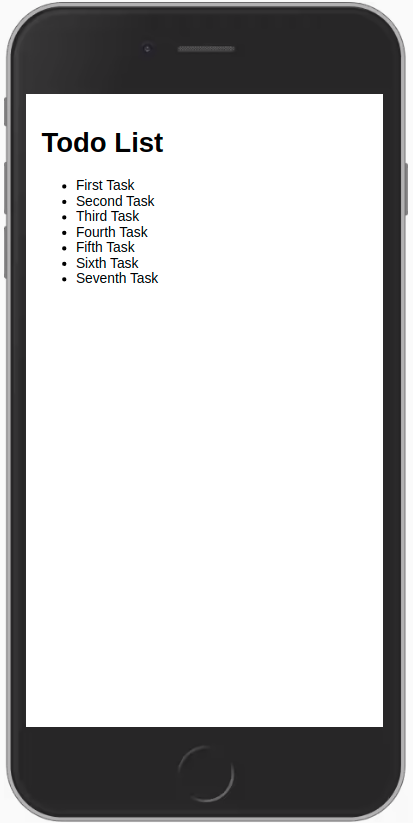
See how your app should look like now:
You can learn more how the $ reactive statements on Svelte’s documentation. We will use the $m tracker, which internally uses Tracker.autorun that allows you to run a function that depends on reactive data sources, in such a way that if there are changes to the data later, the function will be rerun, which makes our tasks query complete with success.
The $m tracker is available to us just because we’re using the Svelte compiler zodern:melte.
You also have the option of using a package like rdb:svelte-meteor-data to access some Meteor functionalities such as useTracker (that has the same purpose as Tracker.autorun) and instead of using $m you could write a code like this:
import { useTracker } from 'meteor/rdb:svelte-meteor-data';

$: tasks = useTracker(() => Tasks.find({}).fetch());
You can change your data on MongoDB in the server and your app will react and re-render for you.
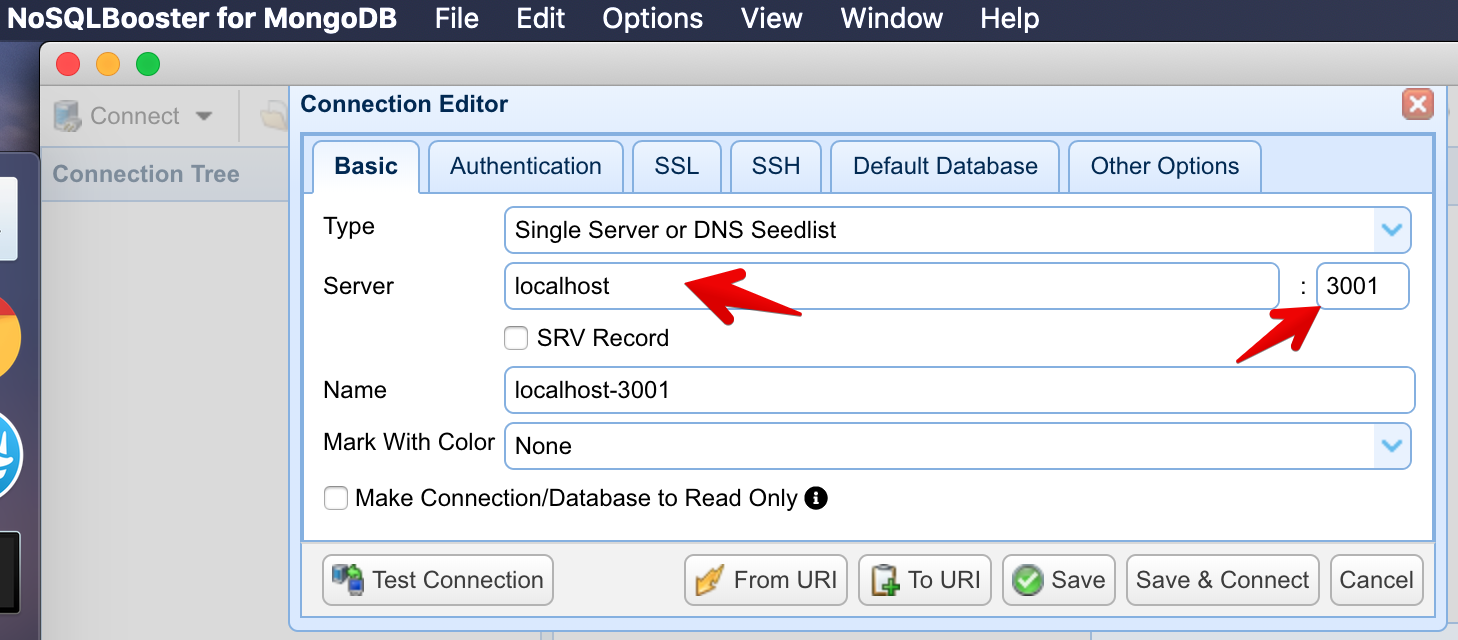
You can connect to your MongoDB running meteor mongo in the terminal from your app folder or using a Mongo UI client, like NoSQLBooster. Your embedded MongoDB is running in port 3001.
See how to connect:
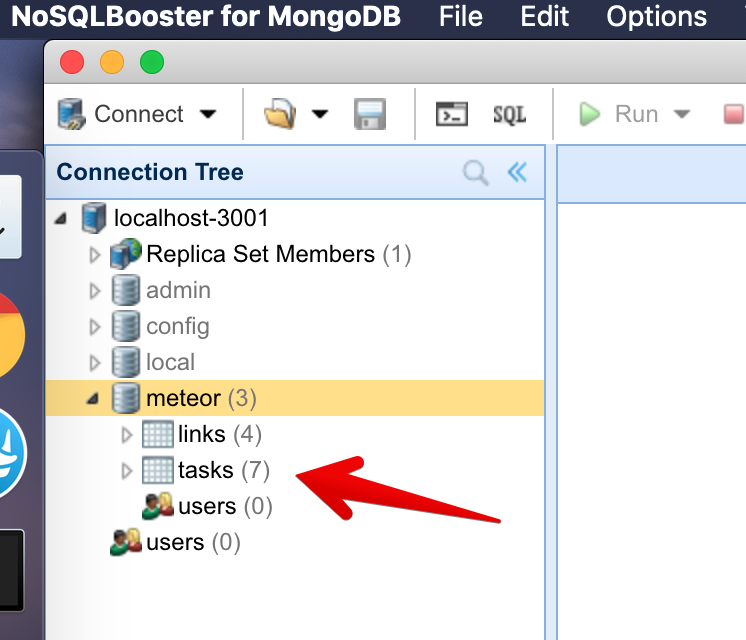
See your database:
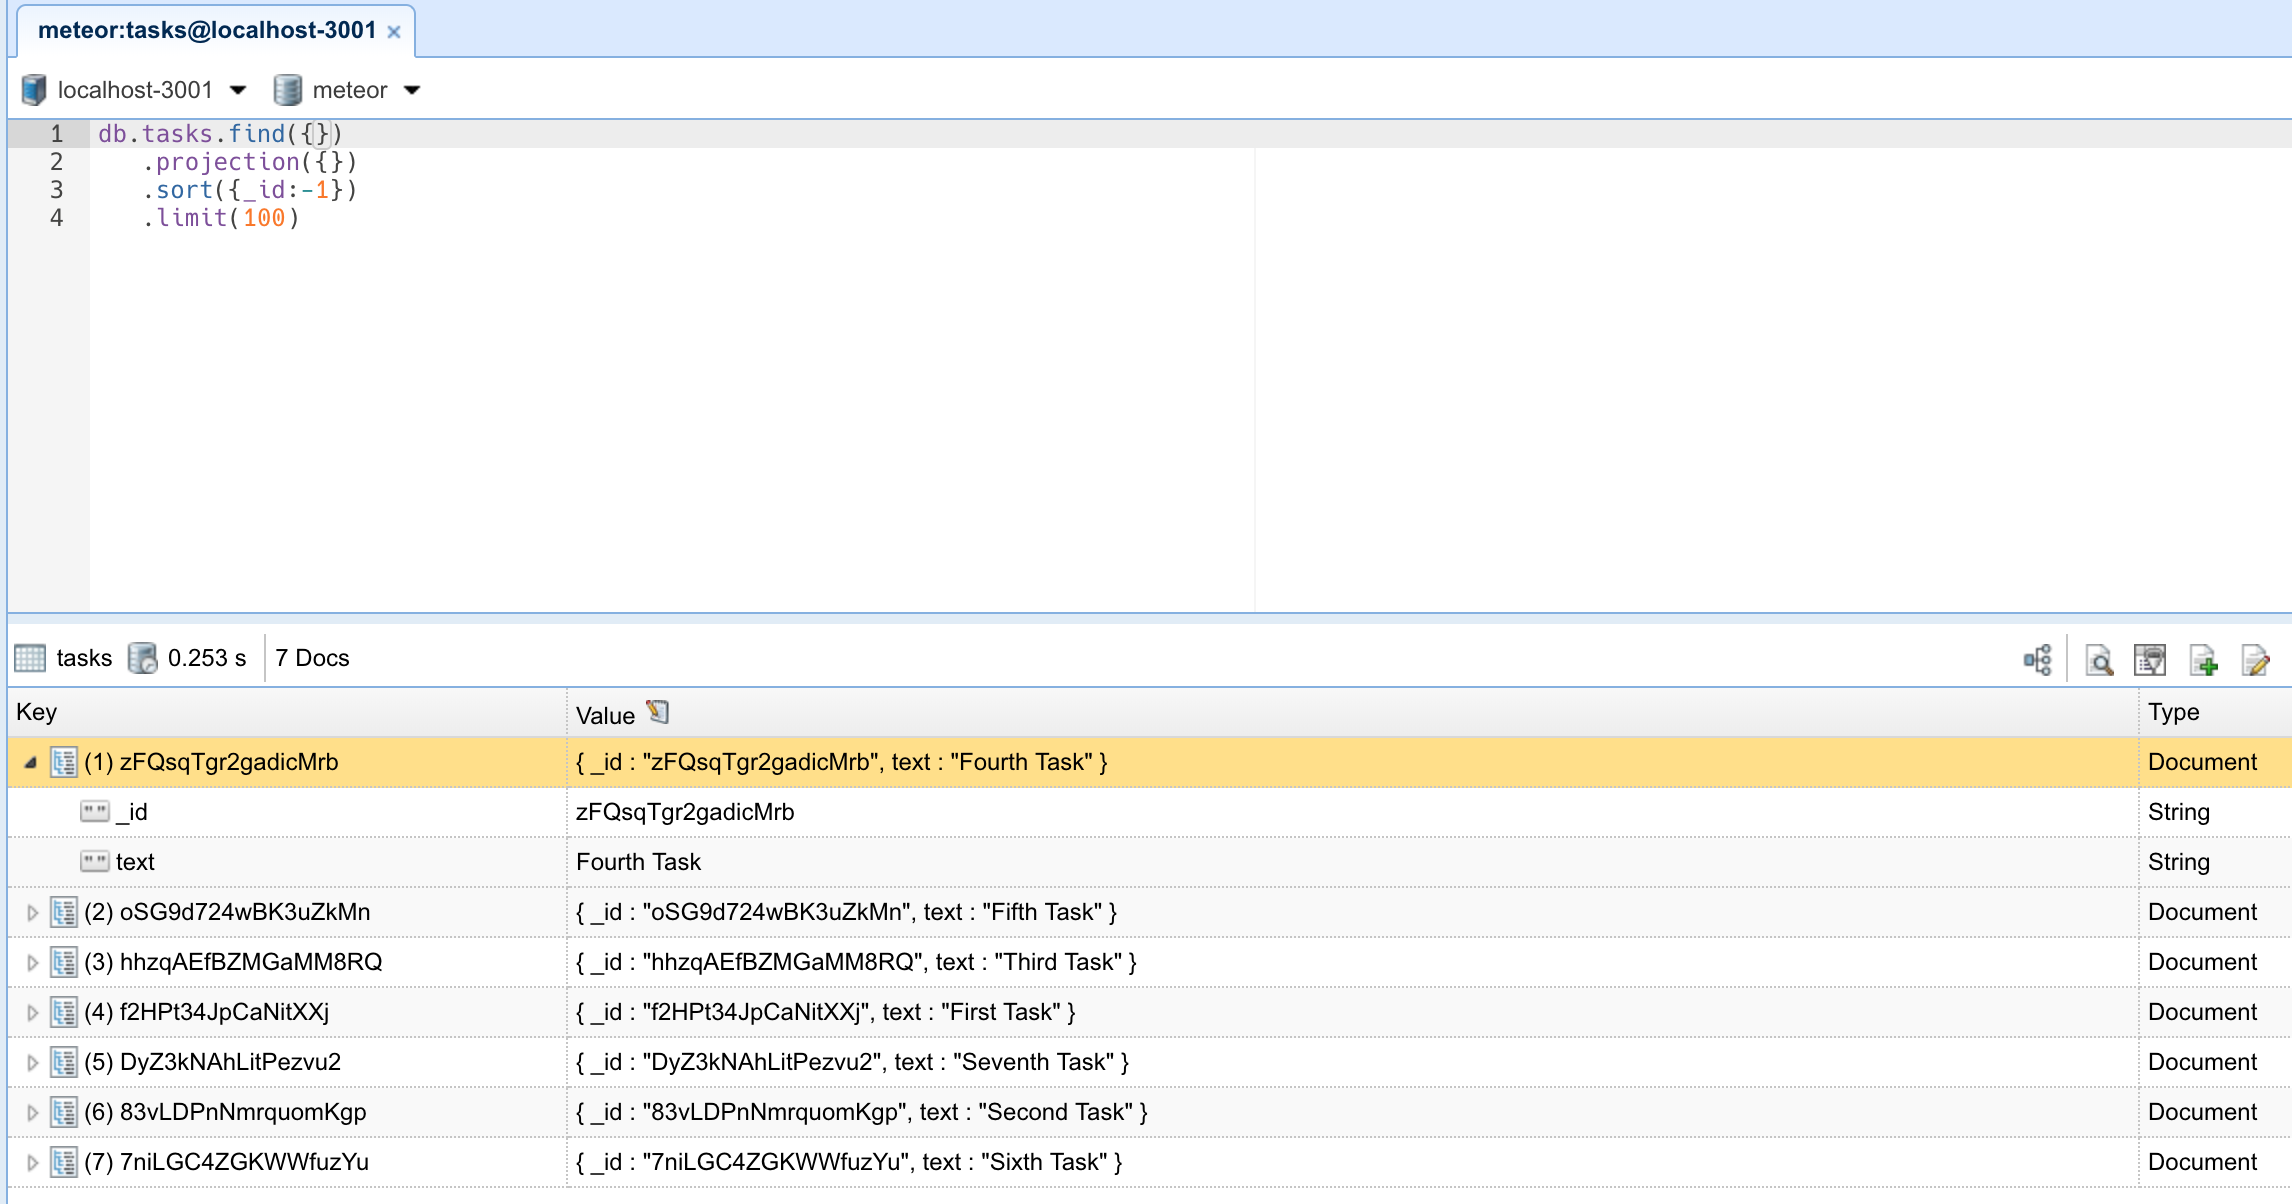
You can double-click your collection to see the documents stored on it:
But wait, how are my tasks coming from the server to the client? We are going to explain this later in the step about Publications and Subscriptions. What you need to know now is that you are publishing all the data from the database to the client. This will be removed later as we don’t want to publish all the data all the time.
Review: you can check how your code should be at the end of this step here
In the next step we are going to create tasks using a form.